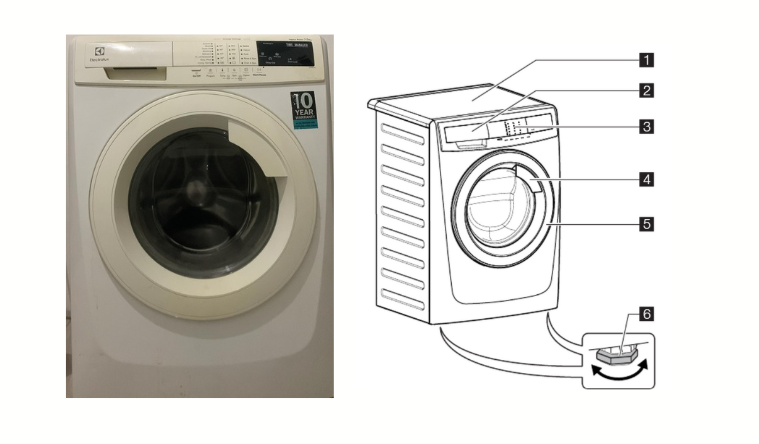
Troubleshooting Electrolux EWF85743 – Error Lock 1 Minute, E23 and E24 problem. This main problem lies in the logic and path of the drain pump. check out how i solved the error
Electrolux EWF85743 Front Loading Machine – Error Lock 1 Minute, E23 and E24 Fix
Introduction
————————————————————
⚠️ Warning: DIY Repair Involves Risk Proceed only if you’re confident in your electronics repair skills. Incorrect handling may result in electrical shock, damage to components, or injury. Always unplug the machine before working on it. DO WITH YOUR OWN RISK.
————————————————————
Modern front-loading washing machines, such as the Electrolux EWF85743 with EWX13611 control board, are packed with sensors and microcontrollers. When one component fails, it can cause a chain reaction of confusing error codes.
In this article, I’ll walk you through my personal repair experience, starting from symptoms to diagnosis and repair.
Front-loading washing machines can be scary to repair. They often use microcontrollers, sensors, and mechanical logic that make them complex. One small failure can lead to multiple error codes and strange behavior. To make things harder, they use tiny components, multilayer PCBs, and rarely include a schematic for reference.
In this article, we will discussing how to solving a electrolux front loading washing machine, especially for ewf85743 with module ewx13611. In my case looks like :
When powered on, the machine locked the door for 1 minute and the display showed only “1”.
After unlocking, touching any button made it lock again for 1 minute. It kept repeating this and never started washing.
It was difficult to enter diagnostic mode, but when I did, it showed Error Codes E23 and E24.
Here’s how I analyzed and fixed it.
If you need another electrical troubleshooting and guide step by step or PCB design, here my link
Before we analyzing
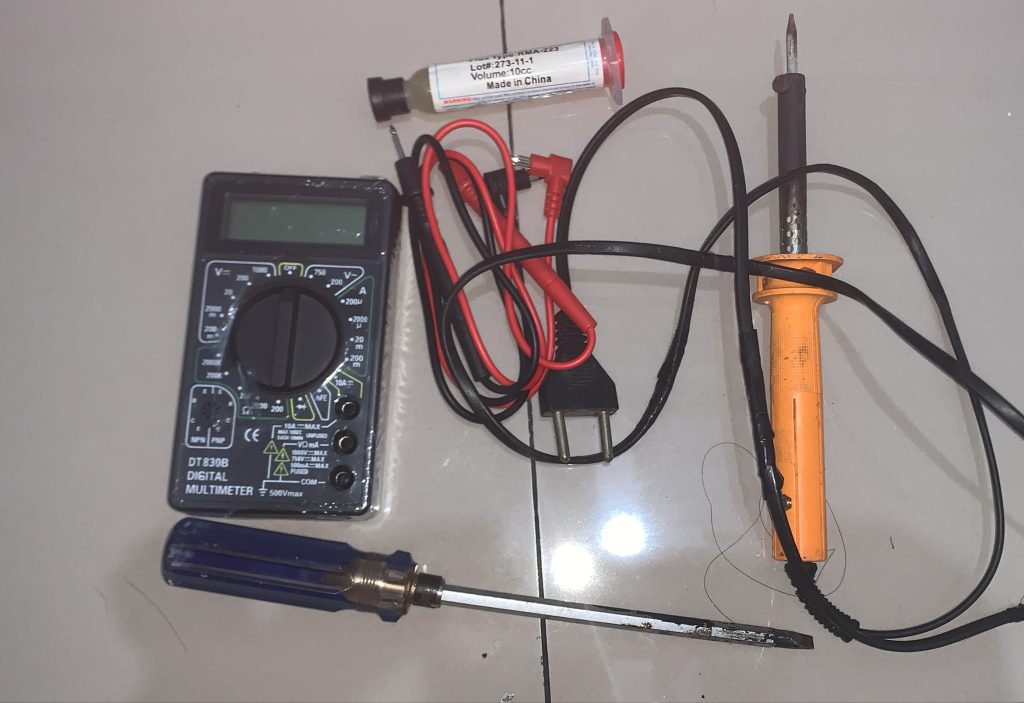
Make sure you have
Skill at electronic, such as read schematic, soldering, and how to tracing a pcb
Can open the electronic devices
Tools such as Multitester, Soldering iron, soldering tin, and flux
Minimal tools for troubleshooting error e24, e23
Analyzing The Error
Understanding The Error Codes
E23: Drain pump triac failure –> Logic Board sending signal to stop cycle with drain and open door lock
E24: Drain pump failure OR sensor/triac issue Both errors are usually related to the drain system or its control circuit, basically main thing is the problem with water outlet
Error 1 minute lock : Control circuit sensing, E23 and E24 appear leading to looping with 1 minute lock but with multiple failure.
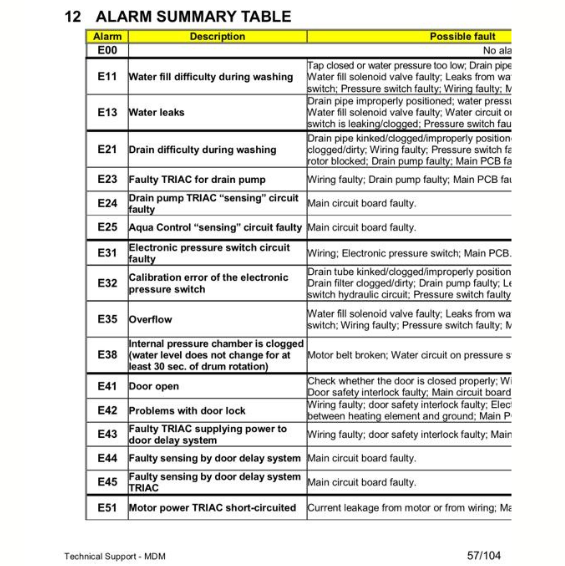
an table for error code
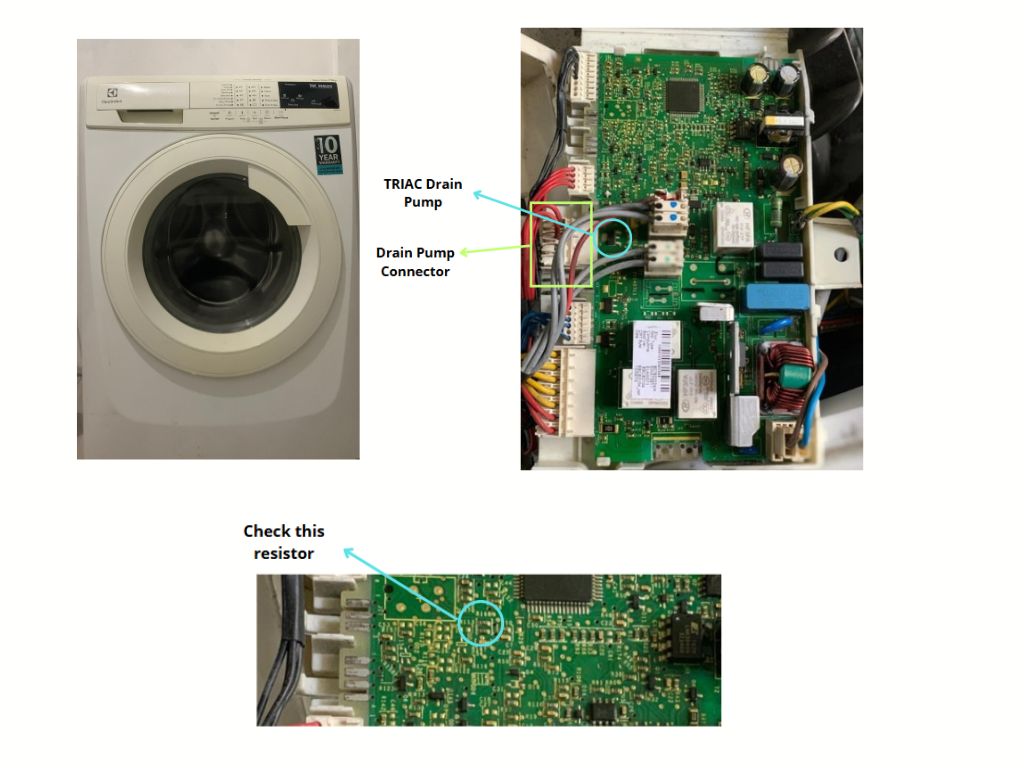
1. Check The Drain Pump
This pump runs at 220V AC (or 180–240V depending on country).
Use a multimeter in resistance mode:
If it shows open loop or no resistance = the pump is likely dead.
For further testing (at your own risk), you can connect it to AC power directly to see if it runs (use a lamp cable and take proper safety precautions).
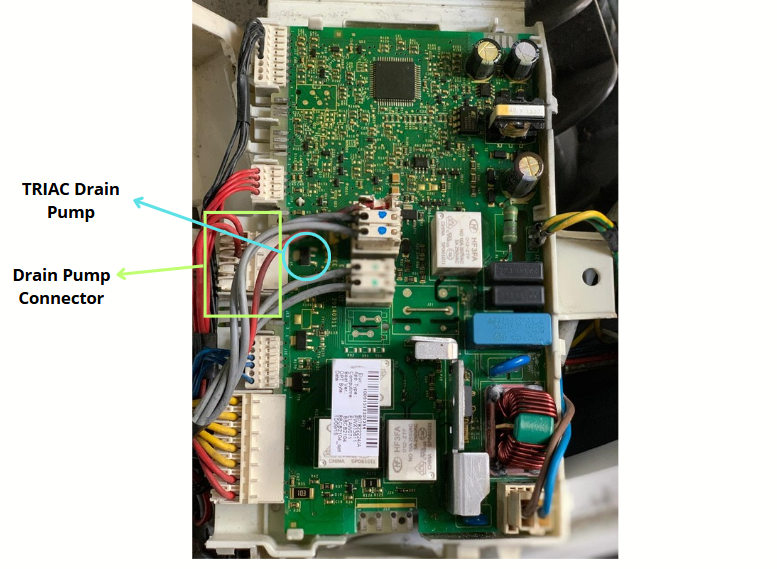
2. Check the Main PCB
⚠️ Unplug the machine from the power outlet before touching the PCB!
Triac and logic of drain pump from main board
Carefully unplug all connectors.
Look for burnt or damaged components near the drain pump connector. if not burn check step 3
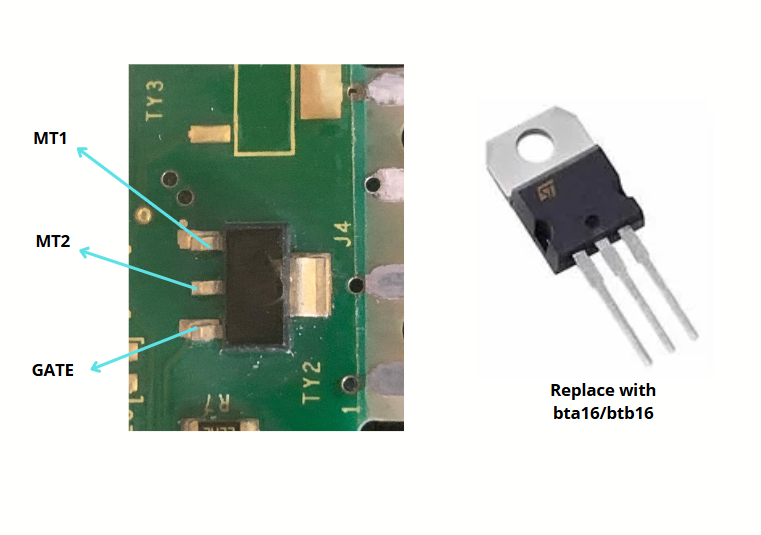
3. Test the TRIAC
The TRIAC controls the drain pump. It looks like a small SMD transistor near the pump output.
Typical pinout:
Pin 1 = MT1
Pin 2 = MT2 (output)
Pin 3 = Gate
Using a multimeter (diode/resistance mode):
Gate (Pin 3) to MT1 = should show some resistance
Gate to MT2 = should be open
MT1 to MT2 = should be open
If values don’t match, replace it. Use BTA16, BTB16, or ACS06 type TRIACs. if not solving the error, check next step!
image triac smd and the pinout
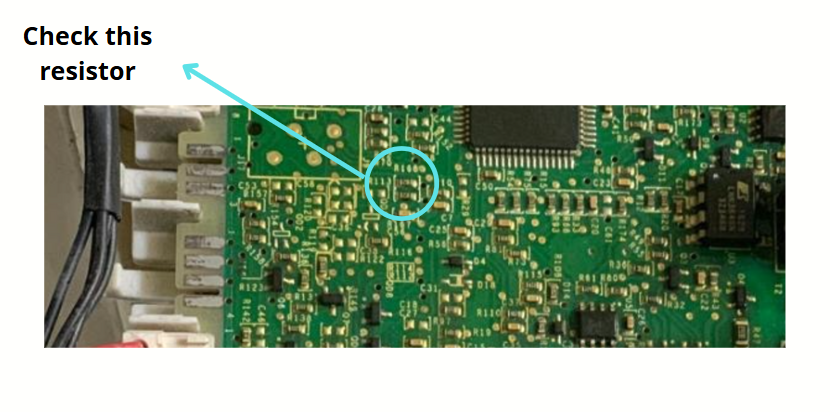
4. Check the Gate Resistor
Trace the gate pin to a resistor labeled “391” (390 ohms).
Measure resistance:
Should be around 390Ω ±5%.
if not, replace it. but if after replacing or the resistor is normal, but error didn’t solved, make sure check next step 🙂
5. Check the Triggering Transistor
If the error not solved, try check the transistor
This transistor drives the TRIAC gate.
The type of the transistor is smd transistor A8A or LMUN2211LT1 (click for the datasheet)
Use a multimeter in resistance mode.
Because in this type using transistor with internal resistance gate, The base usually shows around 10kΩ to the other pins.
If it’s open or abnormal, try replacing it with a similar nearby SMD transistor. Didn’t work? Check Next Step 🙂
6. Check the Voltage Divider
The TRIAC gate is controlled through a voltage divider (2x resistors).
On my board, I found two resistors labeled 102 (1kΩ) connected to the transistor emitter.
Check both:
Each should read ~1kΩ With together = ~2kΩ
If one or nor is off, replace both resistor. this step final, also didn’t work? check last step :v
Location of Divider resistor with value 1K ohm each
7. Check the Pressure Sensor (Optional)
My machine uses an analog pressure sensor (ST545) with 3 pins:
Pin 1: +5V
Pin 2: GND
Pin 3: PWM output
You can test it by
Using a multimeter with frequency mode
Or connecting it to an Arduino/ESP32 to read the signal
Normal:
No pressure = ~40Hz
Blow into it = drops to ~34Hz
Suck into it = increases to ~44Hz
If the signal is abnormal or stuck, consider replacing the sensor.
Result
In my case, the burned drain pump caused:
A failed TRIAC
A burned gate resistor
Faulty resistor divider
After replacing these, the machine worked again!
As an extra test, if you’re unsure whether the pump is triggered, you can connect an AC lamp or small fan to the drain pump connector. If the lamp never turns on, the TRIAC is probably not firing.
Final Thoughts
Repairing modern washing machines isn’t impossible, even without schematics. With patience, logic, and a multimeter, you can often trace the problem down to just a few parts
If you need another electrical troubleshooting and guide step by step or PCB design, here my link
Merancang dan Membuat Bioreaktor Temporary Immersion System (TIS) untuk Kultur Jaringan Tumbuhan Pendahuluan Bioreaktor TIS atau Temporary Immersion System merupakan suatu sistem kultur jaringan dalam
AuralNest – Bioacoustic Recording System Using ESP32 AuralNest is a DIY bioacoustic project designed to capture natural soundscapes — especially bird vocalizations — using